Trends
Learn the best ways to tie gele everytime, here are some steps
Gele is very popular in Nigeria. It is not easy to tie a gele, but, in any case, you can do it yourself at home following our few steps. So how to tie gele?

Gele is very popular in Nigeria. It is not easy to tie a gele, but, in any case, you can do it yourself at home following our few steps. So how to tie gele?
The history of wearing African gele in Nigeria has started long ago. Yoruba women have already been wearing them for a lot of years.
They created some special methods for how to tie Yoruba gele. They even created some for special occasions. You need to follow ten steps in order to tie your gele with no effort and fast.
Here are the steps on how to tie gele
MAKE YOUR HAIR
Before starting your casual or bridal gele, you need to make your hair. So if you have very long hair, put it up and fix it in a ponytail or a knot. You need a smooth foundation for the perfect gele. Once you put your hair up, you’d better also brush it well and mostly in the area of the forehead. You should smooth it up.
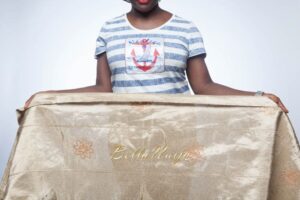
FOLD THE GELE
Start by folding at the end of the gele, this will ensure the is a smooth base at the front (crown of the head). Everything depends on the girth of this gele. If it is extremely wide, you can easily fold it by half. Or you can, for example, bend its one edge. You can fold your gele all the way to another end of it.

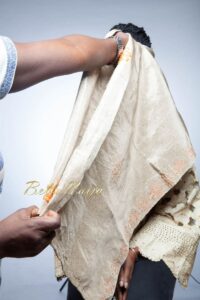
WRAP THE GELE
Take the gele and wrap it around the head from the back to the front (towards your forehead) ensuring that the ends at the front are equal. This aspect is very important.

THE LEFT SIDE SHORTER
Then take one side of the gele, e.g: the left side, and wrap it towards your right all the way round to the left ear and secure with your hands. At this point, the left side of the gele will be shorter than that of the right side.

PUT IT ON YOUR HEAD
Take the right side and cross it over the left side of the gele. Then take the right side (the longer side) round the head to the back, wrapping it and securing it with your hands at the back.


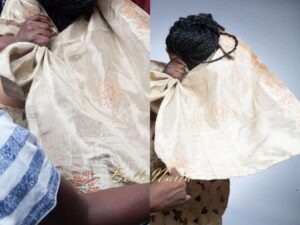
CROSS THE ENDS
At this moment, your gele must stay tight to your head. You should fasten the shorter end using the longer ones
, so now you can free up another hand. Then place the short part under the long one and stick its tail to the other side. After that pull the longer end and then fasten your shorter one. So you have one free hand, which can help you to do the folds.
Begin to squeeze the ends to form a fan from the middle of the layout, ensuring that the leftover at the end closest to you is enough to grip.

WRAP IT ONCE
Make the first wrap all around the head. Watch your folds. This is the moment when you need to form and shape folds. Press crisp bend to your head. Also, make a small indent on the first layer of gele in order to shape some more folds. Move all the way down to your nape.

TIE IT
Secure the grip by typing both ends closest to you into a knot twice and neatly tucking in the loose bits.

ARRANGE THE STEPS
At this point, there will be 2 layers at the top of the gele piece. Start arranging the layer at the back first making sure the highest point of the gele is in the middle.

Source: BellaNaija & Legit
